Telling a story - IPTV Topics
I have
been to many clients' presentations where the presenter executed his presales
pitch with PowerPoint slides. In most cases, the presenter will reuse slides
that are stock presentation materials prepared by the company's global
marketing department. Although the slides would make a good presentation, this process suffered these drawbacks :-
- It can only tell a common
theme; one decided by the marketing team
- The content is not localized
- It does not tell the story; one that is wanted by the client
The
above observation was confirmed when I was asked by a manager of a telco
operator during my IPTV customization training session recently regarding the
features available in the Multiscreen TV solution. The manger gave me the
feedback that the Multiscreen TV solution is a very simple product. I then realized that the presales activity
did not accomplish its purpose of educating the client fully of what features are available in the product. Without knowing the
capabilities of the product, the attendees of the presales pitch could
not cascade to the rest of the company (especially the delivery and marketing
team) the tools & features the operator can use to market their services.
With
this in mind, I started this project of telling a more compelling story to
would be clients of the Multiscreen TV solution. The objective is to educate
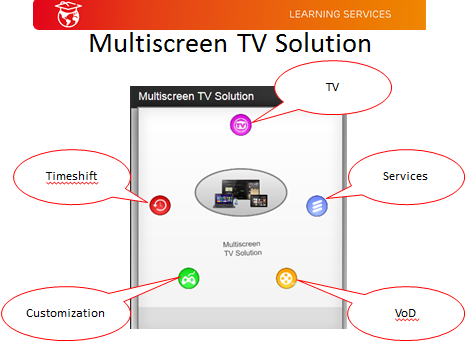
telco operators of available features of the Multiscreen TV solution. I wanted to present a
group of information to the user and allow the user to learn each feature. For this project, I grouped my information as topics.
 |
| IPTV Topics |
Navigation in Captivate
The first task of my
project is to allow users to navigate through my slides to explore each topic. Captivate provides navigation capability through the following interaction tools; namely Button, Click box,
Learning Interactions (interactive widgets) and Drag & Drop.
Note: The last option Drag & Drop interaction object is not available for responsive project.
The following navigation options are available to your end user:-
- Return to the last visited slide.
- Goto to the previous slide
- Jump to a specific slide.
These navigation paths
are illustrated below. Note that there is a subtle difference between go back to the previous slide and return to the last visited slide. The effect is illustrated in the diagram below.
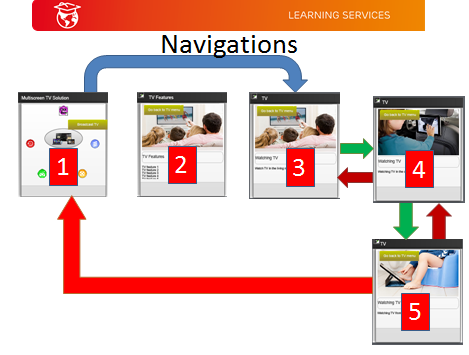 |
Jump to slide: Slide 1 to Slide 3
Goto next slide: Slide 3 to Slide 4
Goto prev slide: Slide 4 back to Slide 3
Goto next slide: Slide 4 to Slide 5
Goto prev slide: Slide 5 back to slide 4
Return to last visited slide: Slide 5 returned to Slide 1
|
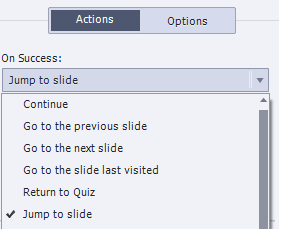
You can navigate your
slides by using a button. In the Actions tab, you can perform any of the above
option.
 |
| Navigation options |
Another navigation
technique that I often used is Click box. To navigate my slides, I draw a click box over an existing
background image; e.g. a map. Then I could specify any of above navigation
option.
Best practice hint: Naming your
slides will make it easy for you to identify the next slide you want to jump
to.
And there is more!
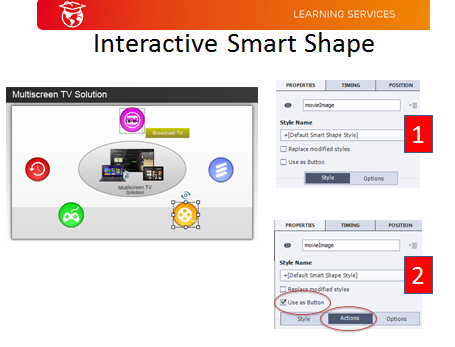
You can even use an existing smart object as an interactive object. Set
the "Use as Button" will turn a normal smart object to an interactive
smart object. There will be an additional tab added to the object properties
namely the "Actions tab".
 |
| Converting a normal smart shape object to an interactive object |
Besides the navigation options in the action tab, you can also set any of the navigation action as part of the action in the "Execute Advanced Actions" or "Execute Shared Actions".
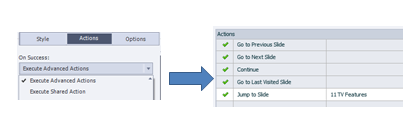 |
| Navigation options as part of Actions |
For my project, I wanted to describe each of the feature of IPTV; e.g. the VoD (Video On Demand) features. One way to illustrate the description of each feature is to implement an accordion-like slide in your presentation. In your slide, you have a set of buttons. The feature title is illustrated by a button and clicking on the button will show the description of the feature.
Option 1 -
Learning Interaction
Adobe Captivate has a few stock standard objects that may be suitable for this task. These are the "Learning Interactions" widgets namely
- Accordion
- Tab control
- Glossary
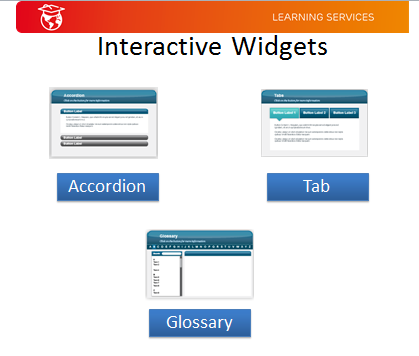 |
| Learning Interactions Widgets |
My first impression is "Viola!"; Without any significant effort, I can complete my slides with the Accordion widget.
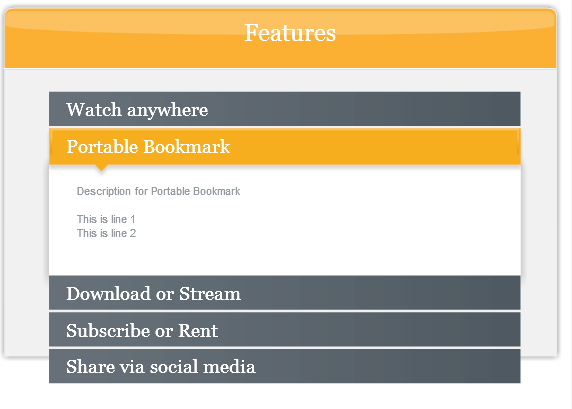 |
| Accordion Widget in action |
I soon discovered a limitation on the widgets; I cannot add more than a certain number of buttons to the widgets. These limitations are shown below:-
- Accordion - maximum 5 buttons
- Tab - maximum 5 buttons
- Process Circle - maximum 6 buttons
- Circle Matrix - maximum 8 buttons
- Glossary - no limit
Option 2 -
Roll your own - simple Advanced Actions
To circumvent this limitation, I have to resort to roll my own implementation. Adobe Captivate provides a set of programmable tools to create a more advanced interaction and customizable presentation. These tools are
- Advanced Actions
- Variables
You can access the Advanced Actions by selecting the "Execute Advanced Actions" or "Execute Shared Actions" from your Actions tab in your object properties tab. For Variables, you can create your own variables from the Project + Variables menu item.
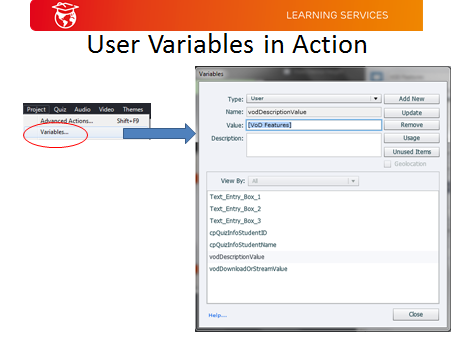 |
| Creating a User Variable |
Best practice hint: the user variable name should describe the purpose of the variable.
My first attempt used 8 buttons as the feature titles, 8 text captions as the feature descriptions and a group of smart shapes as the background of the feature descriptions. I chose a text caption to enter my text of the feature because it is very intuitive (WYSIWYG).
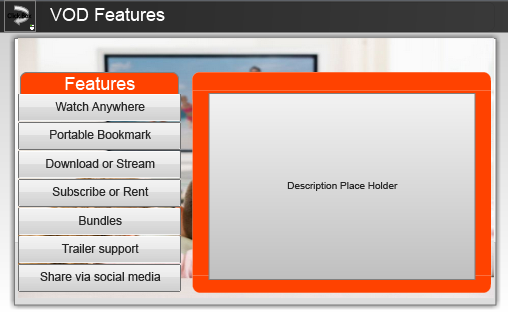 |
| Accordion objects |
Clicking on each button will show the appropriate text caption and hide the rest of the text captions. I used the Hide and Show actions to perform this effect.
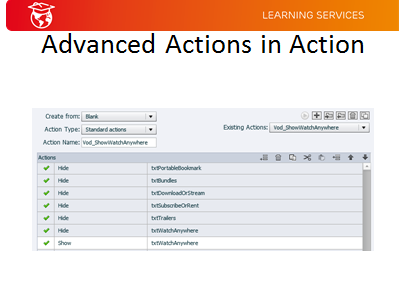 |
| Using Hide and Show actions |
Best practice hint: Naming your objects will make it easy for you to identify the object you want to perform action on.
My process of entering the text of the text captions is to move these captions to the outer viewport, edit the text, then align these captions to the place holder.
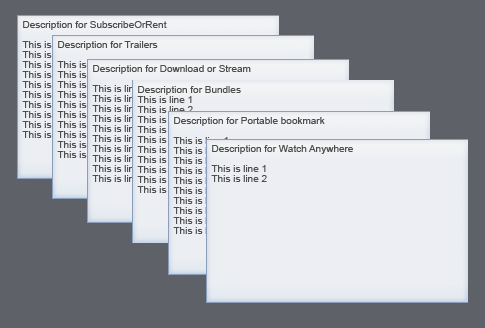 |
| Text captions - one for each feature |
I found that this is not the best option as it requires a bit of moving and shuffling effort every time you want to modify my slide.
Option 2 -
Roll your own - Advanced Actions and variable
Knowing the short fall
of my previous technique, my next attempt explored how user variables can be used to create a more customizable slide.
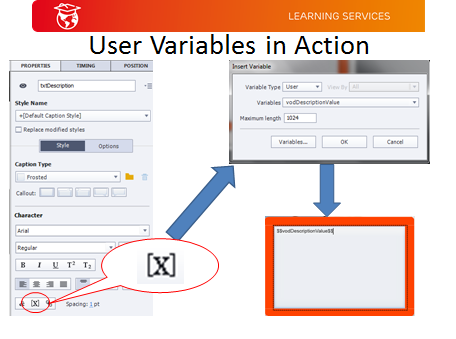
For this technique, I use
- a user variable named
vodDescriptionValue to store the feature description.
- a single text caption named
txtDescription to display the user variable.
- an Advanced Action on the
button to assign the actual description text in vodDescriptionValue
Essentially, this
process is a 2 step procedure. First you assign your user variable to the text
caption. You then assign the text to your variable in the next step.
 |
| Step
1: Assigning a variable to a text caption |
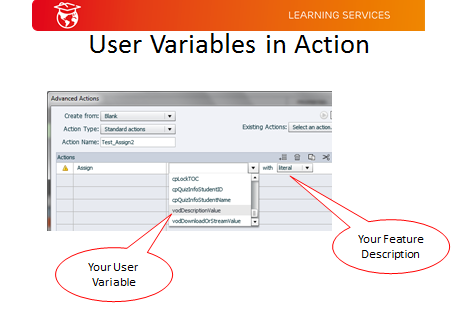 |
| Step
2: Assign the description text to a user variable |
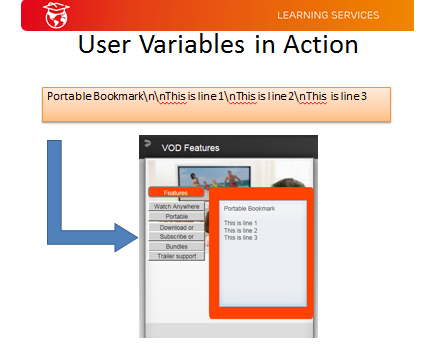
One of the improvements in Captivate v8 allows you to insert line breaks (carriage returns and/or line feeds) to your text. By using "\n" in the text setting the text in the literal field, the "\n" special character will break the lines in the text. For example, the text "Portable Bookmark\n\nThis is line 1\nThis is line 2\nThis is line 3" will be rendered as follows:-
 |
| Technique
to render line breaks |
In addition to the fact that entering the special encoded text is NOT WYSIWYG, I found that
there is an additional flaw in Captivate. Once you have saved your text in the literal
field, you lost the capability to edit the existing text. I tried to export the
project to an xml and modify the source but failed. The only way to update to text
is to retype your text again in the literal field.
Limitation: For an Advanced Action, you
can't edit the Literal text in Assign action.
Option 3 -
Roll your own - Shared Actions
I got around the
limitation of the previous technique by using Shared Actions. Creating a shared
action is similar to creating an advanced action with one additional step. You
will be prompted to enter details on your parameters.
Step
1: Creating a Shared Action
Best practice hint: Naming your
parameters as meaningful as you can will help you remember how to use your
created shared action.
After you have created
the shared action, you assign values to your parameters.
Step
2: Assigning values to your shared action's parameters
This technique has the
advantage over the previous by allowing you to edit your saved
parameters. There is a minor inconvenience though, you will need to assign all the parameter values each time you use the shared action.
Option 4 -
External file
For the bold and those who want to explore advanced techniques to create your presentation, you can use an external file as your input. You specify your data from an external file (CSV, JSON or XML) and use coding (Javascript) to link your data to user variables. This is probably the most advanced and reusable technique for your project. For this exercise, I did not explore this technique as my aim to find the easiest way to customize my presentation with little or no coding.
Lesson recap
As a summary, I have highlighted 4 techniques that are available to authors to tell their stories.
- Option 1 - Learning Interactive widget
- Option 2 - Roll your own - Simple Advanced Actions
- Option 3 - Roll your own - Shared Actions
- Option 4 - External file
Each technique has its own pros and cons and there is no right or wrong to select a particular technique. You select the technique that is most comfortable and familiar to you.


